TIPS and TRICKS
There
are many important elements that go into creating a great photograph of the
full moon:
Having
the right equipment, mastering the technical aspects, & finding the right
location to create a pleasing composition are key.
First
off, you’ll need some specific equipment. Having a decent telephoto lens will
magnify the moon to an extent that it is more than just a very small element in
an otherwise normal landscape shot. Wide angle shots of the landscape with a
full moon can be effective but what we’re talking about here is a shot that
features the full moon as the principal subject.
At
the very least, you should have a 200mm lens on a full frame body. The above
image of the full moon rising in the spires of Sedona’s Cathedral Rock was
captured with a 400mm lens coupled with a 1.4 converter, creating a focal
length of 560mm. With a full frame, 21 mp Canon 5D II to work with, the image
was cropped by around 30% resulting in an effective focal length of around
700mm.
 While
you can spend lavishly on this type of telephoto set-up, it’s also possible to
find a fully usable set-up for $600-$1100. Canon, Nikon, Sony, third party
lensmakers like Sigma & Tamron all have available lenses in this price
range. Derek and Suzanne use the Canon EF 400mm f/5.6L and the Canon 1.4 converter.
Relatively inexpensive, compared with the thousands that can be spent on the
absolute top of the line long telephotos. Shop wisely (eBay and www.fredmiranda.com are good sources for
quality used equipment . . . someone’s always selling something for some
reason). As well, this set-up can also double as a fairly decent wildlife lens
especially with the wide range of usable ISOs with the most modern DSLRs.
As
with all really quality landscape photography, there are technical &
craft-related considerations that must be dealt with, principally exposure.
Most
people tend to want to try and shoot the full moon on the actual day of the
full moon. Because the moon rises after the sun sets, this will always result
in a pronounced luminosity imbalance . . . that is, to properly expose the
exceptionally bright full moon, the unlit, shadowed foreground will be
underexposed, being essentially, in most cases, a silhouette.
Exposing
for the foreground results in the moon being severely overexposed.
But shooting
on the evening of the actual full moon, if well-planned, can produce good captures.
This is usually the result of a good choice of nice silhouetted framing
elements for the moon.
Some
will argue for an HDR treatment, but our experience is that this mostly results
in a technically proficient exposure of both the bright moon and the shadowed
foreground, while the image is aesthetically imbalanced. Very rarely does the
shadowed foreground match the beauty of the full moon and you end up with a
tale of two photographs, that is, the eye is drawn to the beauty of the moon,
and the foreground, both literally and figuratively, pales in comparison.
The
remedy is to simply shoot the day before the full moon! Depending on the
time of year, you will have 30-60 minutes during which time the 99% full moon
will be rising as the sun makes its way toward sunset. You’ll be able to
combine the rich, magnificent low-angle light of the setting sun, illuminating
your foreground, with an equally luminescent rising, full moon!! AAAhhhhhh . .
. the best of both worlds and a relatively simple solution, both technically
(exposure) and aesthetically (balance), to the problems you’ll experience
shooting the actual day of the full moon.
We
have found that a directly-lit foreground (in our case, the amazing sandstones
of Red Rock Country) and an equally bright full moon are a stunning
compositional match for each other.
With
the great distances involved, most likely an f/stop around 5.6-8.0 will give
you the depth of field you need and initially will yield a shutter speed around
1/200th @ ISO 100. You should always keep your shutter speed faster
than 1/80th because the moon will begin to blur at slower speeds
than this. As the sun nears the horizon, the light will slowly dim and you
should be ready to increase your ISO accordingly. We will often finish shooting
at ISO 400 or even ISO 800.
The
final piece of the puzzle is finding the right location. It might seem obvious
but . . . no moon, no moon shot!! It’s not really so silly, if you consider
that capturing the moon rising within compositional elements like red rock
formations means it will be mostly unseen until it emerges.
Remember,
you’ll probably only have 10-15 minutes (sometimes only 2-3 minutes!!) in which
to shoot the moon juxtaposed with other elements. Pre-scouting, some basic
internet research, patience, and tolerance for some mistakes in your first
attempts will eventually produce great results.
First,
you have to know where and when the moon is going to rise. One of the best
sources for the rise times and directional location (azimuth) of the full moon
is Photographers Ephemeris. With the rise times and a compass in hand, you’ll be able to find the precise
position of the rising moon.
As
with many things landscape-related, boots on the ground are invaluable!
Generally,
we are out the day before the day before, seeing the where moon rises and
extrapolating the rise location for the following evening.
You’ll
also have to begin to understand the concept of altitude, that is, where and at
what time the moon will be in the sky as it rises at a diagonal ‘path angle’ of
around 45 degrees. Pre-visualization is key; remember, the moon prior to
peeking out into your carefully planned composition will be hidden behind the
very compositional elements into which it will rise.
Careful
planning, a printed out display of the sun/moon calculator (set for every five
minutes, 60 minutes before & 20 minutes after sunset . . . compass reading
set to display magnetic north [found in the preferences]), a good compass,
patience and the ability to react quickly as the rising moon reveals herself, will
produce incredible images.
As
you find yourself running around like a maniac chasing the moon, remember these
key truths about positioning the moon in your shot: if you need the moon to
move left, move to the left; if compositionally the moon is better to the
right, move to the right; moon too high in the sky, move forward and position
your contextual elements higher in the sky; moon too low, get to higher ground
(usually farther back).
Not
as complicated as it may first seem, experience will blend all these calculated
and empirical parameters. We guarantee you, the first time all the elements
come together, you’ll experience the most amazing adrenaline high as the
larger-than-life beauty of a glorious full moon comes into your viewfinder.
Friday, June 21 - Sunday, June 23, 2013
Summertime in
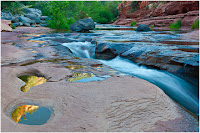
Sedona offers a stunning variety of landscape photography opportunities: the
world famous vistas of Red Rock Country, the intimate waterfalls and reflecting
pools along Oak Creek with freshly blooming high desert wildflowers, plus
extraordinary glimpses into Native American culture and the Old West. The
highlight of the workshop will the opportunity on the first two evenings to
shoot the full moon nestled in sunset-hued red rock spires of Sedona's iconic
Cathedral Rock.


No comments:
Post a Comment