Logo

Logo
Southwest Perspectives

Wednesday, January 1, 2014

2014 Calendar Templates- A present for your New Year !!

Derek and I are always so impressed with the images created by our participants on our workshops!  

Here is a little gift from us to those of you  who use and LOVE Lightroom (that should be all of you by the way!)

Download here:


The .zip files contains 5 Lightroom Print Templates for you to create and print or post 2014 Calendars with your images!  There are a number of size and configuration options for you to choose from.

Also included are 12 JPGS for each of the months for 2014 to drag and drop into your templates along with some examples.  


Full Year 16 X 20

Directions:


Import Jpegs
Import the Month JPG images into Lightroom into a folder
(call it Calendar 2014 if you wish)

How to Load Presets:

In the PRINT Module right click on USER PRESETS in the top left PRESETS panel and select IMPORT

Navigate to the folder where your downloaded the files and add them to your presets
One Month 8.5 X 11


We'd love to see what you create


Select the images you want to use in your calendar and
put copies of them into a collection along with the Month jogs.  Select all the images and go to the Print Module.

From there just drag and drop images and months as you want!!!


If you want to change to color scheme of the Months - take them into the develop module and adjust temperature and/or saturation sliders or the HSL sliders.  Be creative


Full Year 8.5 X 11 and 17 X 22

If you have any problems or questions please contact us

HAPPY NEW YEAR!!!!


Thursday, September 5, 2013

Adobe listened? A creative cloud option for Photographers


The backlash and complaints surge after Adobe's announcement  making its Creative Cloud product suite a subscription-only service. This has been especially true for Photographers who may not need all the programs in the all encompassing package that is too expensive and more than what we need.

In response to that criticism, Adobe has just announced a pared down package for photographers, which includes Photoshop CC, Lightroom, 20GB of cloud storage, and a Behance ProSite for $9.99 a month. The Adobe service, dubbed the "Photoshop Photography Program," was announced during the opening keynote at Photoshop World in Las Vegas.

 "Since introducing Photoshop CC, we’ve listened to feedback from a spectrum of our customers, from advanced professionals to casual enthusiasts," Winston Hendrickson, Adobe's vice president of Engineering, Digital Imaging, wrote on Adobe's Creative Layer blog today. "One common request was a solution specifically tailored for photographers. We listened, and at Photoshop World we’re announcing a special offer for our loyal Photoshop customers."

*** The one catch is that to eligible for the offer, you must already own Photoshop CS3 or higher.  Note that this is NOT an "introductory price." It's offered to anyone who signs up for the Photoshop Photography Program by December 31, 2013.

The deal will be available in the next few weeks at the same time as Adobe introduces final version of Lightroom 5.2. update.

Stay tuned

Tuesday, September 3, 2013

August Newsletter

Here is a copy of our latest newsletter featuring our upcoming workshops to Monument Valley, Colorado and our 8 day adventure up the Big Sur Coast. Hope to see you all on one of our workshops again!


Newsletter August, 2013
 Website     Workshops    Galleries    Registration    About Us    Contact Us 
header
                                                                August, 2013
Greetings! 
We are heading up to Hunts Mesa on Friday with our eager and excited workshop participants! Looking forward to waking up high above Monument Valley and capturing magical images from dawn to dusk.

If you missed this opportunity - we will be heading back to Monument Valley  September  11th - 14th to photograph the Mitten Shadow. Twice a year, photographers come from all over the world to capture the magic moment when the westernmost of Monument Valley's iconic Mitten formations aligns perfectly with the sun to cast its shadow on its eastern partner as the waning moments of the day bathes them in rich red hues of classic southwest sunset light. We will also have special access with a Navajo guides to photograph the Totem Pole and Y'ei Bi Chei, petrolglyph sites and Tear Drop Arch.  We have also arranged for a sheep drive with Effie Yazzie. 
 
* We have a couple of spots left on this trip so reserve your place now!
 
As always, our workshops cover both the technical and creative aspects of landscape photography & we provide transportation, lodging, guiding and one on one, exceptional, expert instruction and small group sizes.
Sincerely,
Suzanne & Derek
 
Sunday, Sept. 29 - Thursday, October 3, 2013
(5 days/4 nights; hotel included)
 
The resplendent aspens of Colorado amidst the rugged Alp-like peaks of the San Juan Mountains are sought out every fall season by photographers from all over the world. Over five days at the peak of the season, we'll seek out the very best fall colors at iconic locations like Ouray, Silverton, the Sneffels Range along the Dallas Divide, Yankee Boy Basin, and more. We'll ride the Million Dollar Highway every day thru the passes of the southern Colorado Rockies in search of the very best photographic opportunities......more info
Saturday, February 22 - Saturday, March 1, 2014
(8 days/7nights; hotels included
From the moment you start this amazing road trip, you'll leave the world behind as you wind up, over & down along 350 miles of the world's most rugged coastline in a land where populations dwindle, trees and mountains soar & waves crash in a landscape cold, green & beautiful. For seven days & nights, we'll wind our way along legendary U.S. Highway 1 thru four separate coastal regions of incomparable beauty: Santa Barbara; Morro Bay/San Simeon; Big Sur; Carmel/Monterey. The journey will offer an amazing diversity of photographic opportunities: seascapes of all order; quaint boat harbors, Spanish Mission architecture, ocean wildlife & sea birds, tidepools, winter waves,redwoods & live oaks, sand dunes,historic span bridges and endless miles of rugged coastline await you.....more info
WORKSHOP SCHEDULE

White Sands
April 2013 SOLD OUT

Sedona Full Moon 
June 2013 SOLD OUT

August 2013
SOLD OUT

September 2013

September 2013
2 SPOTS LEFT

February 2014

Itineraries coming soon

Call for details 

White Sands - Balloon Fest 
September2014

Keep Checking back as we are adding new and exciting 
workshops

Customized personal workshops available on request
PHOTO TIP O' THE MONTH
Fall Photography
TOP TEN TIPS
We all patiently wait through the heat of the summer for the cooler air of fall and look forward to the changing landscape.  Where hillsides and forests are transformed into vibrant tapestries of gold and yellow reds and oranges.
The creative possibilities are endless.  From the frost covered single leaf to a grand panoramic view. Capturing the best of the season requires a combination of knowledge, preparation, timing patience and equipment.
To improve your fall photography we offer the following tips:
1.
Use your histogram for getting perfect exposures.  Use the Color histogram that displays all your channels.  This will show you what color might be clipping and losing precious detail.
2. 
Use your polarizer.  They can  intensify color, reduce glare and reduces light to allow for longer shutter speeds
3. 
Look for mirror-like reflections in lakes, pools or even puddles.
4. 
Look up! Shoot up into the tops of the trees. Bold autumn colors juxtaposed with a brilliant blue sky.
5. 
Look down! The leaves beneath your feet create amazing patterns.
6. 
Add a sunburst. Close your aperture (f16 -22).  Clean your lens, take off all filters.  Pick your lens.  If you have a lens with an uneven number of blades it will produce a more dramatic sunstar. A wider lens with a smaller aperture opening is preferred.
7.
 Play around with motion blur.  Move your camera up and down during an exposure or zoom your lens in and out of a scene.  Create some interesting and abstract images.
8. 
Don't forget flash and reflectors to pop light into a shady spot.
9. 
Use Backlight to add drama to your image.  Shooting in the early morning and evening.  Colors always look there best when the sun in low in the sky.
10.
Don't overlook overcast days. They are wonderful conditions to shoot in.  Nature's natural diffuser, it reduces harsh shadows and allows you to photograph all day.


"By far the best, most intensive, hands on, learning experience I've ever had"

"Derek and Suzanne are teaching every hour of every day.  My photographic skills jumped completely to the next level"

"Small groups, one on one learning, from composition to post processing, capture to print...Brilliant and unforgettable experience with these two enthusiastic and accomplished photographers and teachers"


Southwest Perspectives | 602-769-7533 or 928-282-1991 | info@southwestperspectives.com | http://www.southwestperspectives.com
90 Juniper Lane
Sedona, AZ 86336
STAY IN TOUCH
Like us on Facebook      Find us on Google+     
info@southwestperspectives.com


Thursday, May 30, 2013

TONE POEMS IN BLUE & WHITE: WHITE SANDS NATIONAL MONUMENT


Aaahhhh  .  .  .  what more can be said about White Sands National Monument, . . . a photographic treasure of such extraordinary beauty & limitless potential that one is left, literally, speechless, atop lonely dunes, in a sea of such, beholding varieties of light & color that sweep this magnificent landscape in endless patterns of waves, light, and lines?

Watching, searching, seeing, bending, kneeling, crawling, lying prostrate in supplication . . . Surely, you think, he must be mad, speaking in terms of spiritual reverence and piety.  At the very least .  .  .  a touch melodramatic!

But wait, spend an afternoon there, in the heat of a summer monsoon, watching clouds gather, the sun playing hide & seek, casting its rays, filtered & direct, here, there & everywhere, each shading of light creating its own special color on the infinite tabla rasa that is this incredible, indelible white desert.

Or see the sun rise, the horizon subtly saturated in the violets and pale blues of the earth's own shadow.


No less, stay 'til the last breaths of light fade in the evening, contemplating the most surreal variety of colors in the sky and sand at sunset.

Stay 'til the journey back to civilization is fraught with danger, a baited breath game of landmarks and route-finding over a thirty minute hike with little or no depth perception in the dark, fifty foot tumbles down steep dune faces threatening every step of the way. Try & keep your eyes adjusted and focused, an effort almost certain to fail as the lush, luminous moon rises full in an eastern sky.

Take great care, for you could miss the road & walk forever (or at least much of the night), although a summer's night in the dunes might not be too bad . . .

Always remember, in the words of naturalist author Charles Bowdoin, to “look and listen and close your eyes and feel.” “In short,” he implores, “become like a photograph and take in what is before you.”


What you will see, to quote Lawrence Cheek, is “vastness defined, . . .[a] lesson in the power of landscape to seize the imagination and trigger a transcendent moment.”

Transcendent? Indeed! Melodramatic? Hell, yes!! Slightly mad? Probably! . . .

But judge ye not . . . instead, spend a day there, sunrise to sunset, dawn to dusk, and you’ll come to smile knowingly. Go ahead, try & wipe it off your face!!


Text by Derek Von Briesen 

Thursday, May 2, 2013

Saturday, April 13, 2013

Southwest Perspectives Participant makes cover of Outdoor Photographer!

Dean Cobin, one of Southwest Perspectives' workshop participants has an amazing image from our Monument Valley Workshop on the cover and inside the latest edition of Outdoor Photographer! Congratulations Dean...we couldn't be more proud!


Friday, April 5, 2013

TIPS and TRICKS


There are many important elements that go into creating a great photograph of the full moon:

Having the right equipment, mastering the technical aspects, & finding the right location to create a pleasing composition are key.


First off, you’ll need some specific equipment. Having a decent telephoto lens will magnify the moon to an extent that it is more than just a very small element in an otherwise normal landscape shot. Wide angle shots of the landscape with a full moon can be effective but what we’re talking about here is a shot that features the full moon as the principal subject.
At the very least, you should have a 200mm lens on a full frame body. The above image of the full moon rising in the spires of Sedona’s Cathedral Rock was captured with a 400mm lens coupled with a 1.4 converter, creating a focal length of 560mm. With a full frame, 21 mp Canon 5D II to work with, the image was cropped by around 30% resulting in an effective focal length of around 700mm.

While you can spend lavishly on this type of telephoto set-up, it’s also possible to find a fully usable set-up for $600-$1100. Canon, Nikon, Sony, third party lensmakers like Sigma & Tamron all have available lenses in this price range. Derek and Suzanne use the Canon EF 400mm f/5.6L and the Canon 1.4 converter. Relatively inexpensive, compared with the thousands that can be spent on the absolute top of the line long telephotos. Shop wisely (eBay and www.fredmiranda.com are good sources for quality used equipment . . . someone’s always selling something for some reason). As well, this set-up can also double as a fairly decent wildlife lens especially with the wide range of usable ISOs with the most modern DSLRs.

As with all really quality landscape photography, there are technical & craft-related considerations that must be dealt with, principally exposure.

Most people tend to want to try and shoot the full moon on the actual day of the full moon. Because the moon rises after the sun sets, this will always result in a pronounced luminosity imbalance . . . that is, to properly expose the exceptionally bright full moon, the unlit, shadowed foreground will be underexposed, being essentially, in most cases, a silhouette.

Exposing for the foreground results in the moon being severely overexposed.

But shooting on the evening of the actual full moon, if well-planned, can produce good captures. This is usually the result of a good choice of nice silhouetted framing elements for the moon.

Some will argue for an HDR treatment, but our experience is that this mostly results in a technically proficient exposure of both the bright moon and the shadowed foreground, while the image is aesthetically imbalanced. Very rarely does the shadowed foreground match the beauty of the full moon and you end up with a tale of two photographs, that is, the eye is drawn to the beauty of the moon, and the foreground, both literally and figuratively, pales in comparison.

The remedy is to simply shoot the day before the full moon! Depending on the time of year, you will have 30-60 minutes during which time the 99% full moon will be rising as the sun makes its way toward sunset. You’ll be able to combine the rich, magnificent low-angle light of the setting sun, illuminating your foreground, with an equally luminescent rising, full moon!! AAAhhhhhh . . . the best of both worlds and a relatively simple solution, both technically (exposure) and aesthetically (balance), to the problems you’ll experience shooting the actual day of the full moon.

We have found that a directly-lit foreground (in our case, the amazing sandstones of Red Rock Country) and an equally bright full moon are a stunning compositional match for each other.

With the great distances involved, most likely an f/stop around 5.6-8.0 will give you the depth of field you need and initially will yield a shutter speed around 1/200th @ ISO 100. You should always keep your shutter speed faster than 1/80th because the moon will begin to blur at slower speeds than this. As the sun nears the horizon, the light will slowly dim and you should be ready to increase your ISO accordingly. We will often finish shooting at ISO 400 or even ISO 800.

The final piece of the puzzle is finding the right location. It might seem obvious but . . . no moon, no moon shot!! It’s not really so silly, if you consider that capturing the moon rising within compositional elements like red rock formations means it will be mostly unseen until it emerges.  

Remember, you’ll probably only have 10-15 minutes (sometimes only 2-3 minutes!!) in which to shoot the moon juxtaposed with other elements. Pre-scouting, some basic internet research, patience, and tolerance for some mistakes in your first attempts will eventually produce great results.

First, you have to know where and when the moon is going to rise. One of the best sources for the rise times and directional location (azimuth) of the full moon is Photographers Ephemeris.  With the rise times and a compass in hand, you’ll be able to find the precise position of the rising moon.

As with many things landscape-related, boots on the ground are invaluable!
Generally, we are out the day before the day before, seeing the where moon rises and extrapolating the rise location for the following evening.

You’ll also have to begin to understand the concept of altitude, that is, where and at what time the moon will be in the sky as it rises at a diagonal ‘path angle’ of around 45 degrees. Pre-visualization is key; remember, the moon prior to peeking out into your carefully planned composition will be hidden behind the very compositional elements into which it will rise.

Careful planning, a printed out display of the sun/moon calculator (set for every five minutes, 60 minutes before & 20 minutes after sunset . . . compass reading set to display magnetic north [found in the preferences]), a good compass, patience and the ability to react quickly as the rising moon reveals herself, will produce incredible images.

As you find yourself running around like a maniac chasing the moon, remember these key truths about positioning the moon in your shot: if you need the moon to move left, move to the left; if compositionally the moon is better to the right, move to the right; moon too high in the sky, move forward and position your contextual elements higher in the sky; moon too low, get to higher ground (usually farther back).

Not as complicated as it may first seem, experience will blend all these calculated and empirical parameters. We guarantee you, the first time all the elements come together, you’ll experience the most amazing adrenaline high as the larger-than-life beauty of a glorious full moon comes into your viewfinder.


                               Friday, June 21 - Sunday, June 23, 2013

Summertime in Sedona offers a stunning variety of landscape photography opportunities: the world famous vistas of Red Rock Country, the intimate waterfalls and reflecting pools along Oak Creek with freshly blooming high desert wildflowers, plus extraordinary glimpses into Native American culture and the Old West. The highlight of the workshop will the opportunity on the first two evenings to shoot the full moon nestled in sunset-hued red rock spires of Sedona's iconic Cathedral Rock.
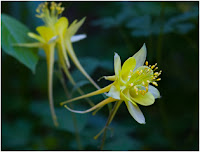


We hope you'll join us. Sedona's sunrises and sunsets are legendary; the early summer electric green foliage; high elevation canyon temperatures comfortable for long sessions; the town, with its accomodations and restaurants, friendly and welcoming.Over our four days together, we'll visit the most iconic locations in Sedona: red rock vistas like Cathedral Rock, Coffee Pot Rock & Schnebly Hill; waterfalls & reflections along spectacular Oak Creek; the Sinaguan ruins at Palatki, and we'll even take a short trip across Verde Valley to visit Gold King Mine, a fascinating ghost town near Jerome with an amazing collection of vintage cars, trucks, mining equipment and reconstructed buildings from all over the West (think Bodie but with a lot more to shoot!).Suzanne & Derek will guide students to the very best compositional perspectives and provide nuanced technical tips specifically related to the challenges posed by the wide variety of photo opportunities available in Sedona. We'll shoot flowing water, employing the longer shutter speeds necessary to obtain the classic 'silky' water effect! As they capture world-class photographs, students will gain technical mastery of their cameras, see compositions in new ways and begin to understand the spiritual connection between themselves and the landscape.